Emerge from Crypto Winter Victorious and Sip Pixelated Drinks in Paradise (📷 bobbyg603)
Definition 📖
“The term ‘crypto winter’ refers to a cryptocurrency market that is underperforming. The term is analogous to a stock market bear market. Crypto winter is characterized by negative sentiment and lower average asset values across a broad range of digital currencies.” — Diksha Sharma
Crypto Winter 🥶
It’s November 2022 and cryptocurrency markets have been getting hammered as of late. The FTX catastrophe has monopolized headlines and many news outlets are, once again, declaring cryptocurrency dead.
Despite sentiment on cryptocurrency turning sour, crypto winter is the best time for developers and creators to dive into new projects. Crypto winter is when the “get rich quick” people retreat into their caves and those who understand cryptocurrency’s transformational potential start to hunt for the next big project.
On Your Mark 👟
In this tutorial, we are going to develop a suite of basic Node.js tools for deploying an NFT contract to Ethereum. We will leverage Alchemy, Hardhat, and Pinata to build and deploy an ERC-721 token contract that can be viewed in a Metamask wallet.
This tutorial has been condensed from an Ethereum.org post to focus on the “how” behind deploying an NFT. If you’d like more information about the “why” behind various steps in this article please see the original blog article or leave a comment below.
A companion repo for this tutorial is available via the link below.
Get Set 😬
Before we can develop our contract we need to get familiar with the tooling. We’ll be using Alchemy and alchemy-sdk-js to build code that interacts with the Ethereum blockchain. Pinata is an IPFS pinning service that we’ll use to host the image for our NFT. Hardhat provides tools for developing and testing smart contracts on Ethereum. Metamask is a crypto wallet and gateway to blockchain apps.
Before continuing the tutorial, please create an Alchemy account. By using this link you can start for free, and we’ll both earn platform credit if you decide to upgrade in the future.
Additionally, you’ll want to create a Pinata account to host the image for your NFT on the decentralized IPFS network.
Finally, you’ll want to download the Metamask and export a copy of your account’s public address and private key. Don’t share your privates with anyone!
Go!🚦
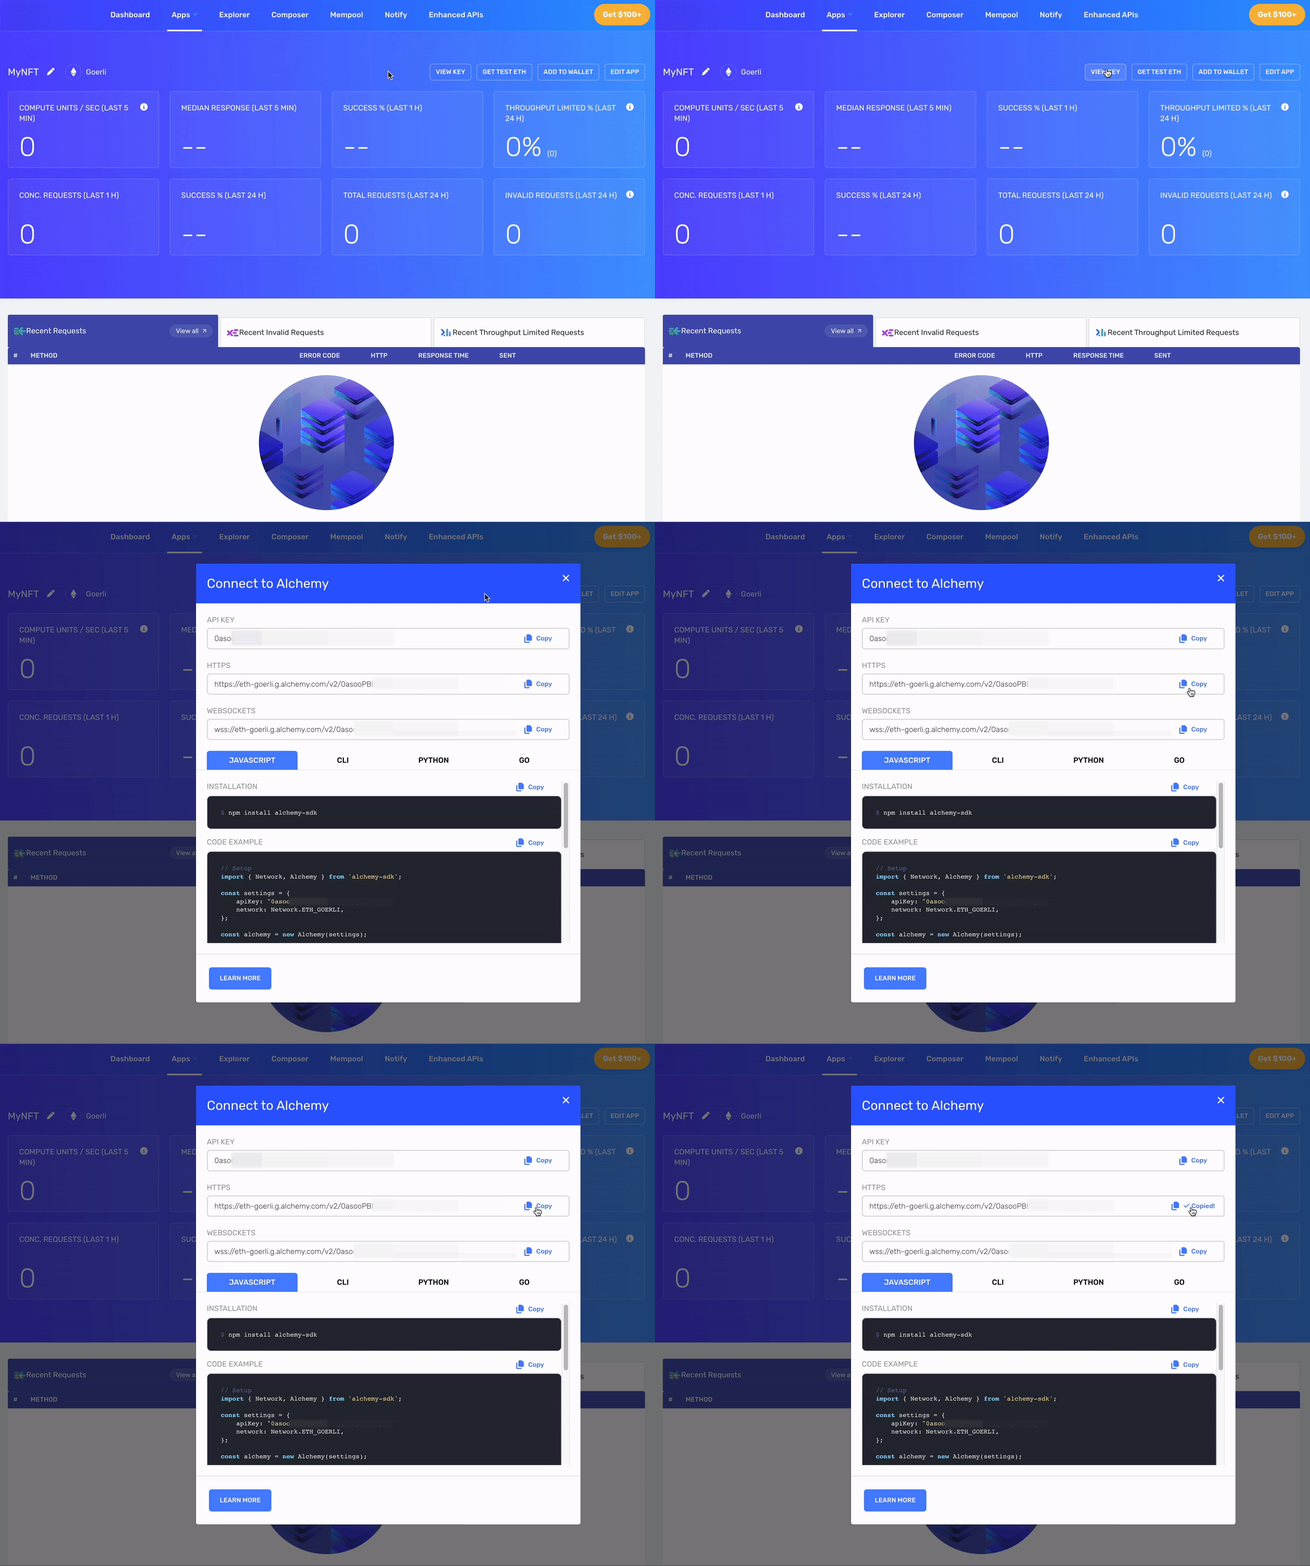
Out of the gate, the first order of business is creating a new app on Alchemy making sure to select the Goerli test network. Once we’ve created a new app, we’ll want to copy the HTTPS API URL.
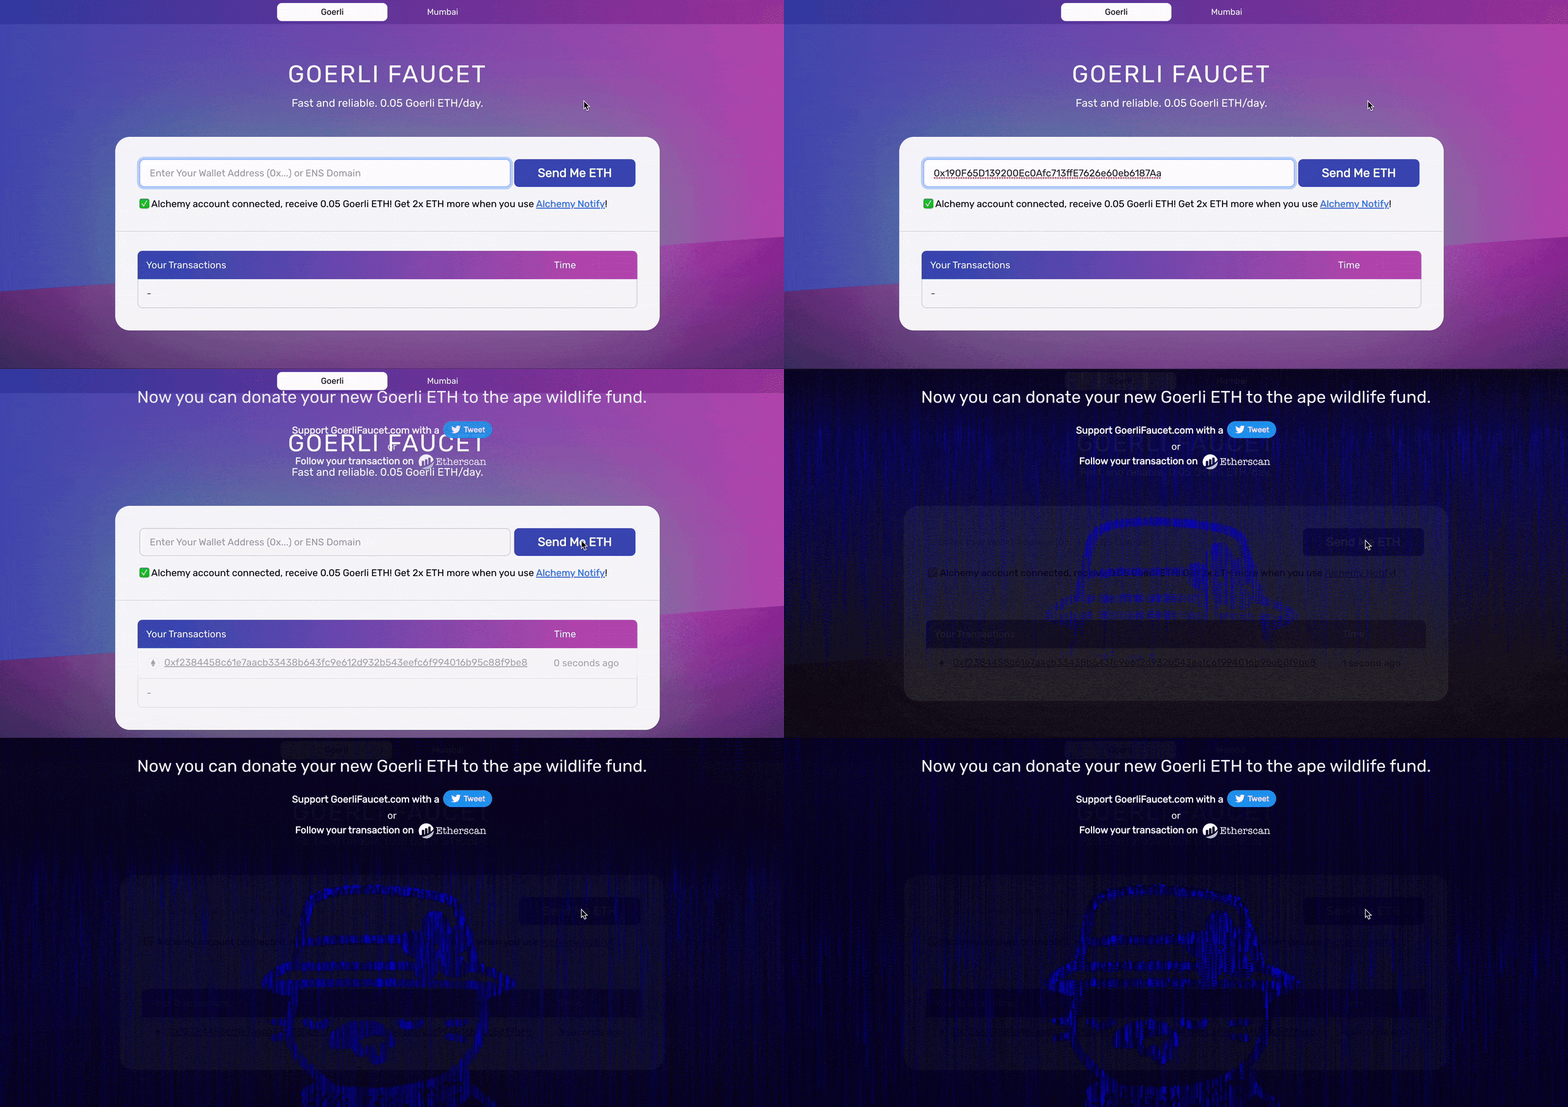
The next obstacle we need to navigate is acquiring some ETH on the Goerli test network. To get your ETH for testing, navigate to the Goerli Faucet provided by Alchemy.
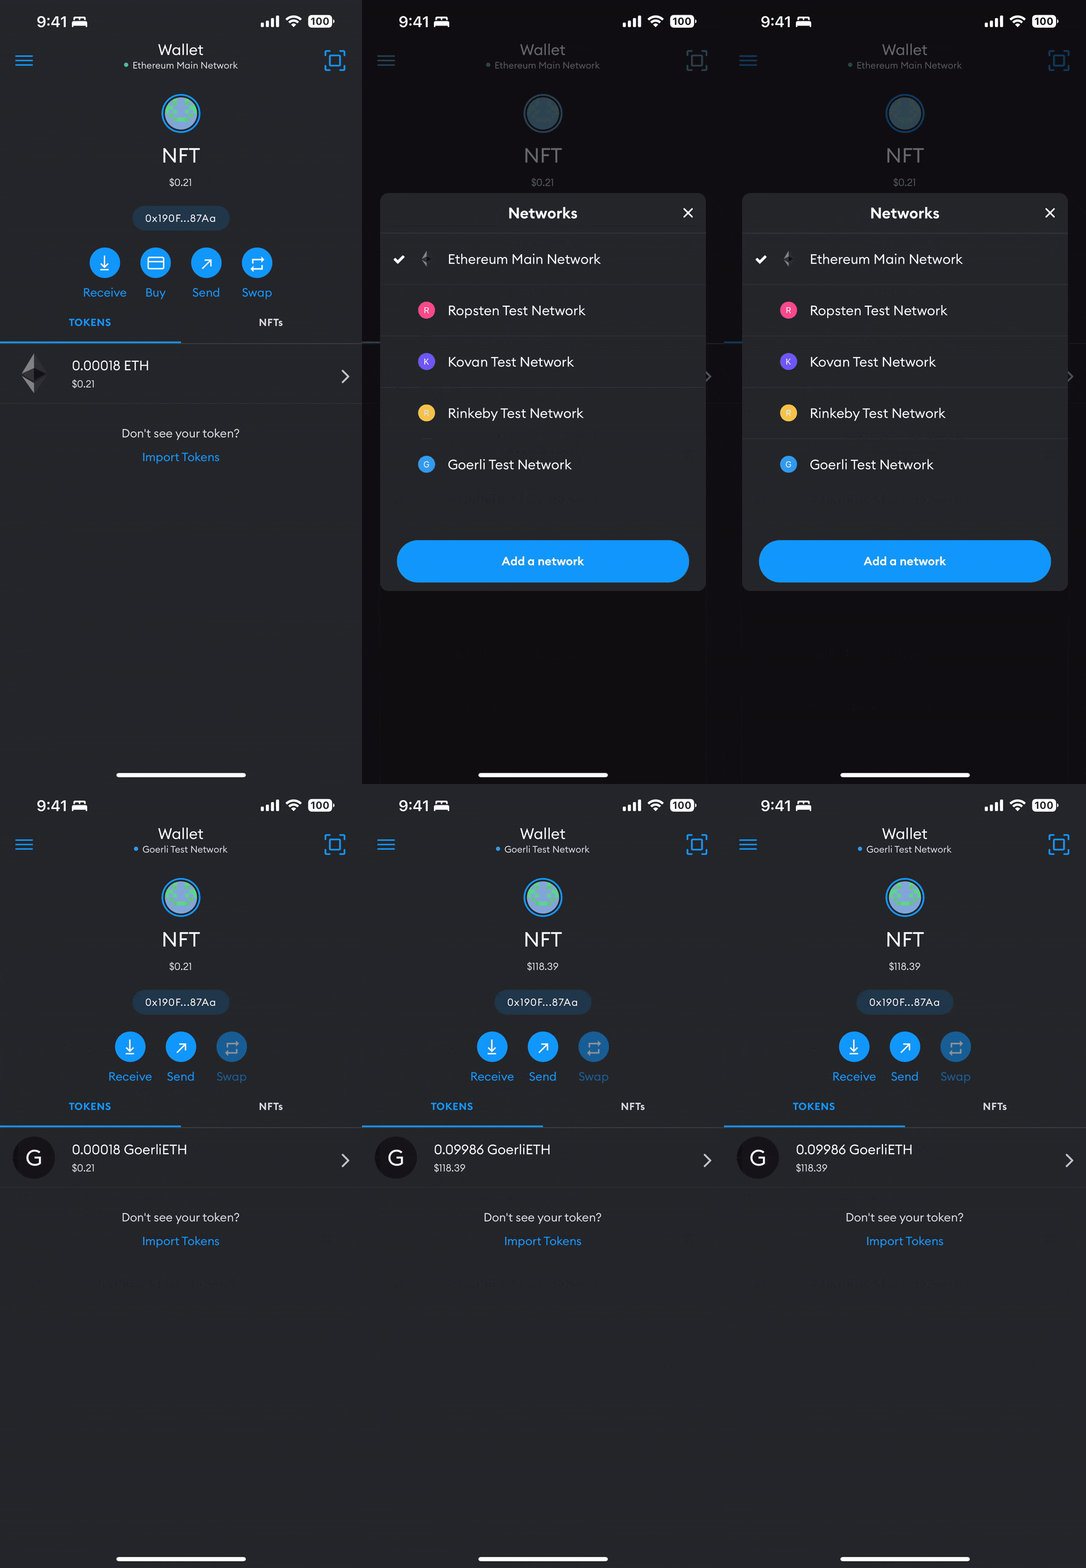
Switch to the Goerli test network in Metamask tapping the Wallet button at the top of the app to reveal the list of test networks. Ensure that you received some test ETH from the faucet in the previous step.
On your desktop, create a folder and initialize a new Node.js project.
mkdir nft && cd nft && npm init
Add development dependencies.
npm i --save-dev hardhat @nomiclabs/hardhat-ethers ethers@^5.0.0 ts-node typescript
Add production dependencies.
npm i @alch/alchemy-web3 @openzeppelin/contracts dotenv
Create a new Hardhat project.
npx hardhat
Create directories to store contracts and scripts.
mkdir contracts scripts
In the contracts folder create MyNFT.sol.
In your project’s root directory, create a .env file to hold your environment variables and secrets. Do not check this file into source control!
API_URL="https://eth-goerli.g.alchemy.com/v2/your-api-key"
PRIVATE_KEY="your-metamask-private-key"
PUBLIC_KEY="your-metamask-public-key"
In your project’s root directory, create hardhat.config.ts.
Hardhat Config File
Let’s compile our MyNFT.sol contract.
npx hardhat compile
Create a deployment script deploy.ts in the scripts folder.
Run your deployment script to deploy your compiled MyNFT contract to the Goerli test network. Copy your contract deployment address.
npx hardhat --network goerli run scripts/deploy.ts
# Contract deployed to address: 0x4C5266cCc4b3F426965d2f51b6D910325a0E7650
Our NFT will represent a piece of generated art. You can generate an image yourself (using DALL-E 2 or Stable Diffusion) or you can use this article’s header image.
Once you’ve selected an image, upload the image to Pinata and copy the file’s CID.
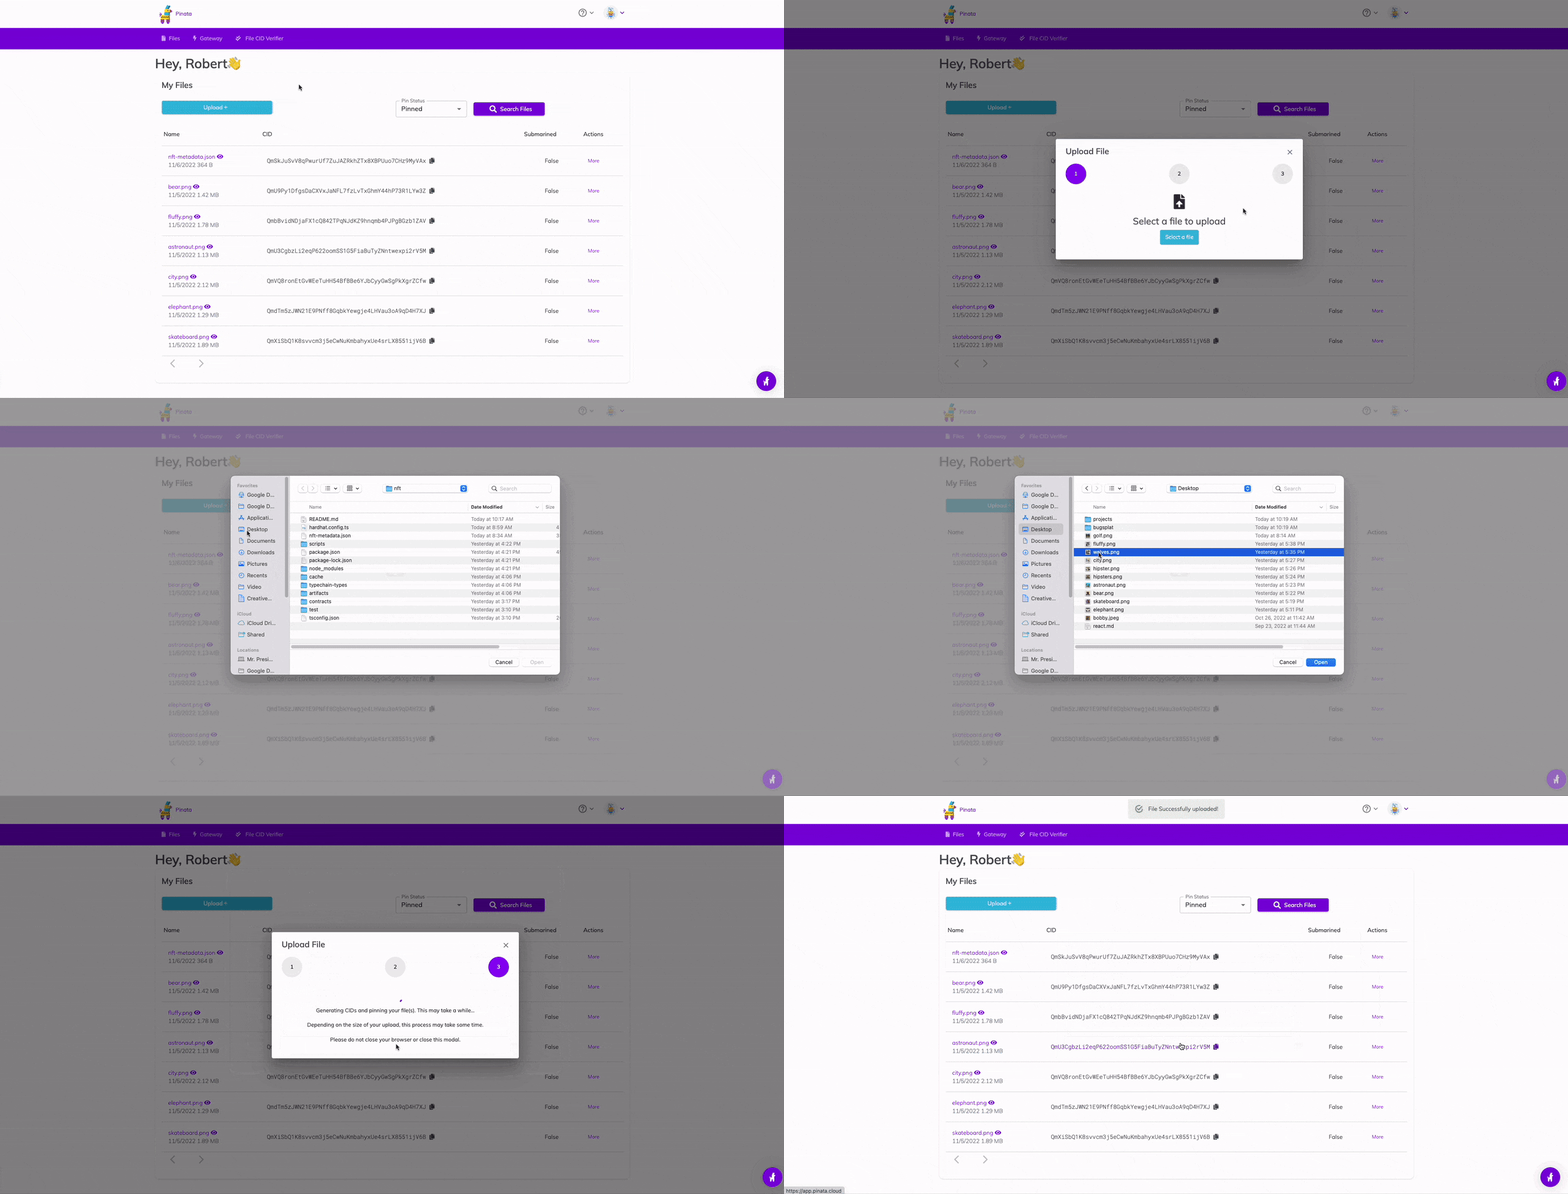
Create a nft-metadata.json file you your project’s root replacing your-ipfs-image-CID with the CID you copied from a previous step. Upload nft-metadata.jsonto Pinata and make note of its CID.
{
    "attributes": [
        {
            "trait_type": "Planet",
            "value": "Earth"
        }
    ],
    "description": "Astronaut enjoying a drink at a tropical resort.",
    "image": "ipfs://your-ipfs-image-CID",
    "name": "Captain Cook"
}
Now it’s time to mint a new NFT! Let’s create mint-nft.ts in the scripts folder. Be sure to replace the values of your-contract-address and your-ipfs-metadata-CID with the values you copied in previous steps.
Mint your NFT!
npx ts-node scripts/mint-nft.ts
Finally, add your NFT to Metamask so you can show it off to your friends.
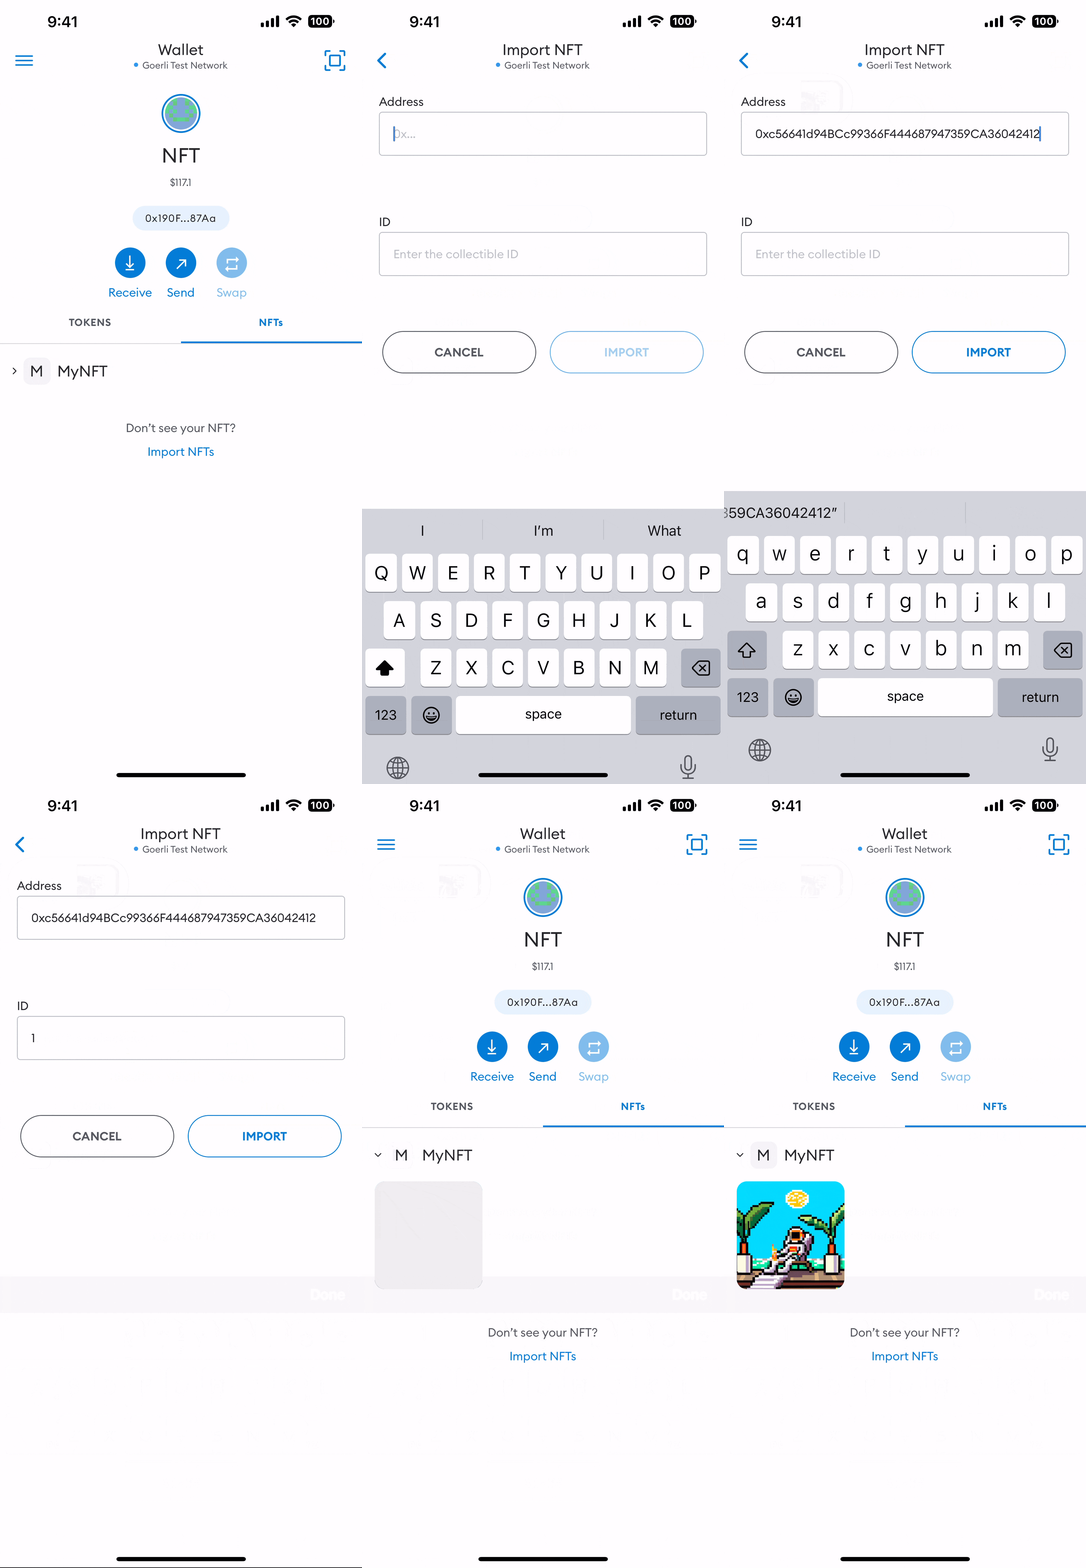
Mainnet 🏙️
⚠️ Be careful! Creating a new NFT contract is expensive. At the time of writing the transaction fee was 0.0267 ETH or ~$30.52. Minting an NFT is cheaper and costs approximately 0.001 ETH or ~$1.50.
You can repeat the process on the Ethereum Mainnet by making the following changes:
Replace the
API_URLvalue in.envwith an HTTPS API URL of Ethereum Mainnet Alchemy App.Deploy your contract to the Ethereum Mainnet
npx hardhat run scripts/deploy.ts
Replace the
contractAddressvalue inscripts/mint-nft.tswith the new Mainnet contract addressMint a new NFT
npx ts-node scripts/mint-nft.ts
Now that you have an NFT on the Ethereum Mainnet you can things like set your Twitter profile picture to a hexagonal NFT and display your NFTs on OpenSea.
Congrats! 🎉
You’ve taken the first step on your journey into NFT development! If you have any cool ideas for an NFT project or are unsure where to go next, please leave a comment below or message me on Twitter — I’d love to hear about your next project!
Want to Connect? 🔌
If you found the information in this tutorial useful please subscribe on Hashnode, follow me on Twitter, and/or subscribe to my YouTube channel.